BpExtract User Guide for iPhone
This describes how to use the BpExtract app on an iPhone. You must be running version iOS 17 or above and to benefit from uploading to Apple HealthKit you will need to enable this when requested (or later you can alter these settings in Settings -> Health -> Data Access and Devices -> BpExtract -> Turn On All).
Initial Setup of the BpExtract App
Opening the BpExtract App for the First Time
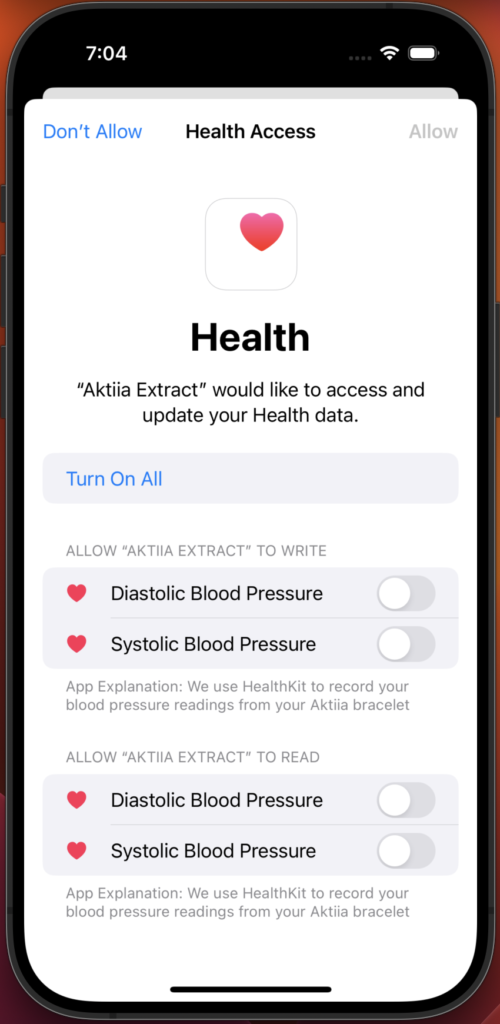
When you open the app for the first time you will be asked to allow reading and writing from HealthKit for the blood pressure readings. Please allow these for the app to write your blood pressure readings to Apple HealthKit. If you do not enable these settings then the app will still work but the Apple HealthKit import facility will be disabled. You will still be able to extract your data in CSV format and download/share this data.
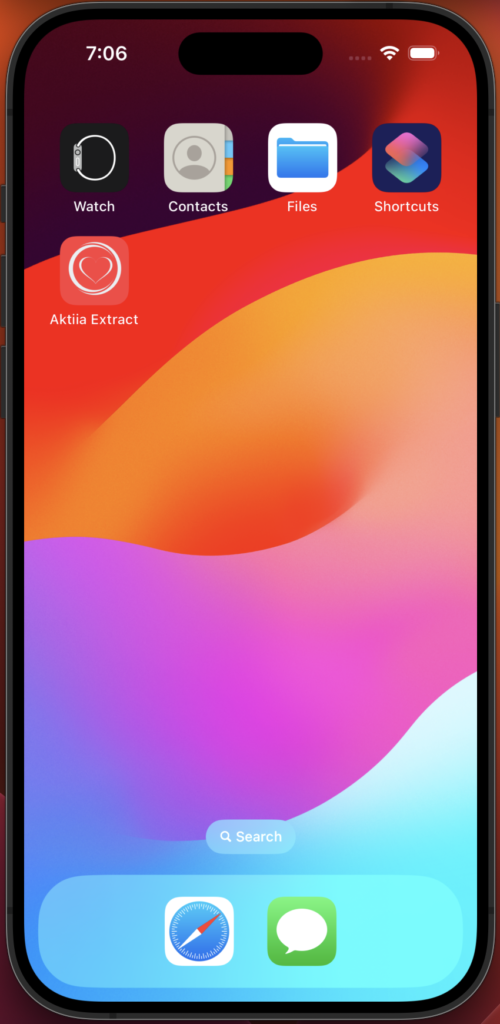
Select the BpExtract App from the Home Screen:
Enable the HealthKit permissions
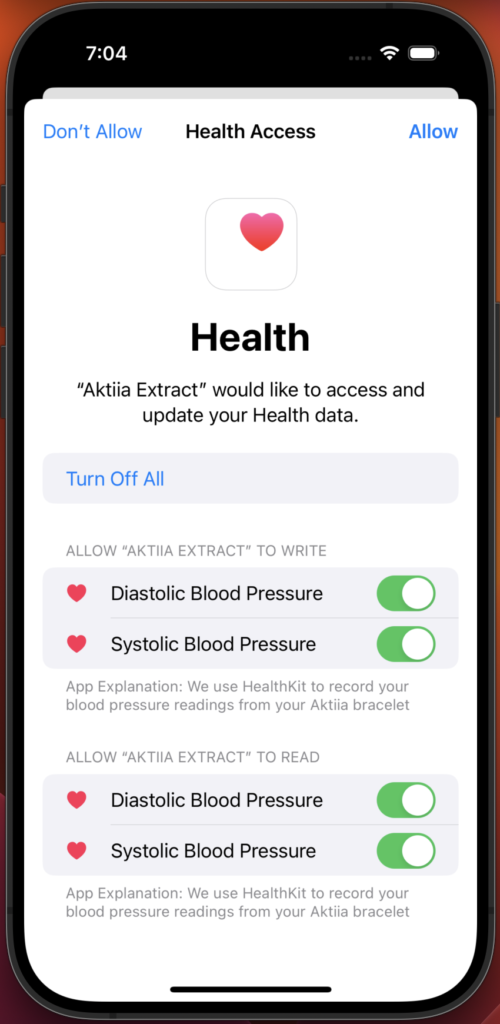
Click Turn on All to enable all the HealthKit permissions:
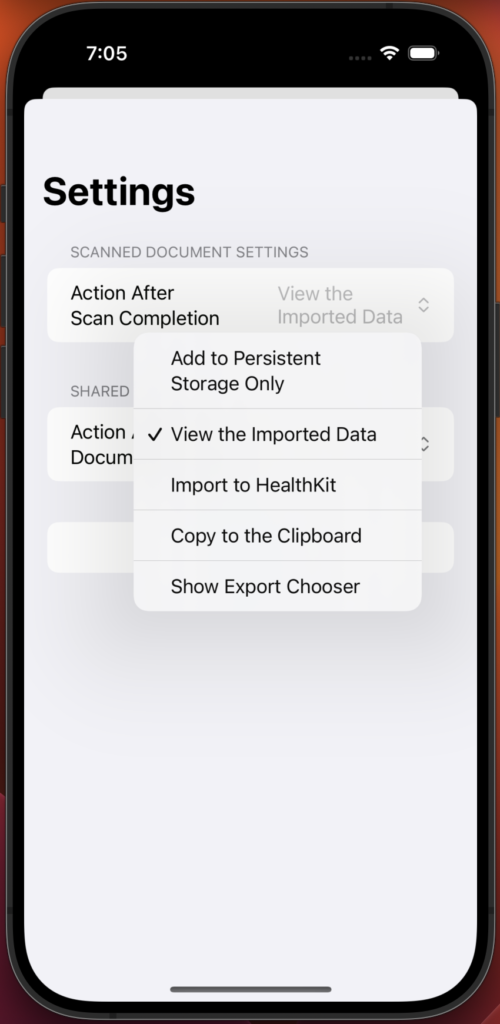
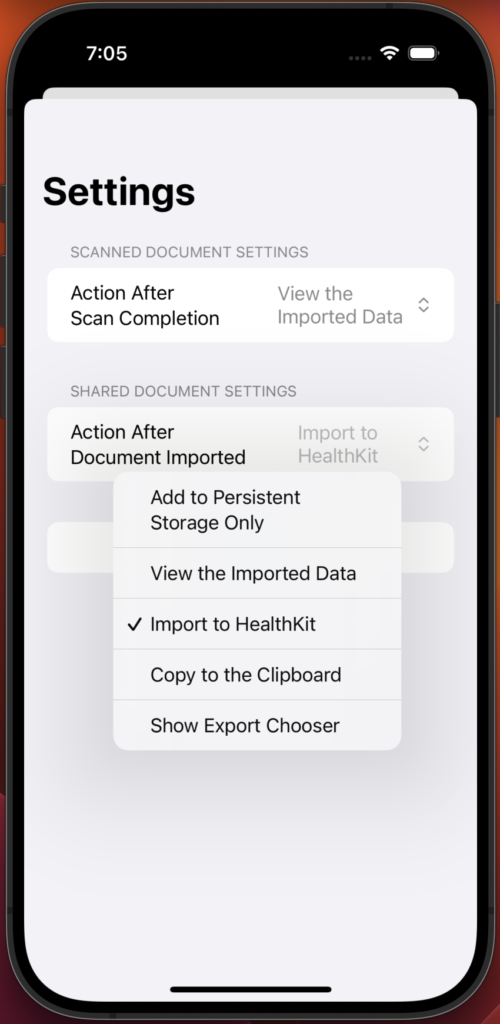
Set Default Action
To set what action takes place when you scan or import a document click the Settings icon.
The following describes what each of these options means:
- Scan – This means when you request the scanning of a Hilo report from the menu
- Import – This means when you share a document (either directly from the Hilo Bracelet App or from another App such as Files)
You may wish to set the action to always import to HealthKit when you scan or import a document. Other options are:
- Store in persistent storage
- View the scanned document
- Copy to the clipboard
- Show the extract chooser (will offer you the option to decide what action to perform each time)
The above action is the default action you want to take place when the appropriate action is triggered. After the document is scanned you will be able to view the report and you can still send the data to HealthKit or share the CSV data to another person or App.
Scanning a Report using BpExtract
Scanning
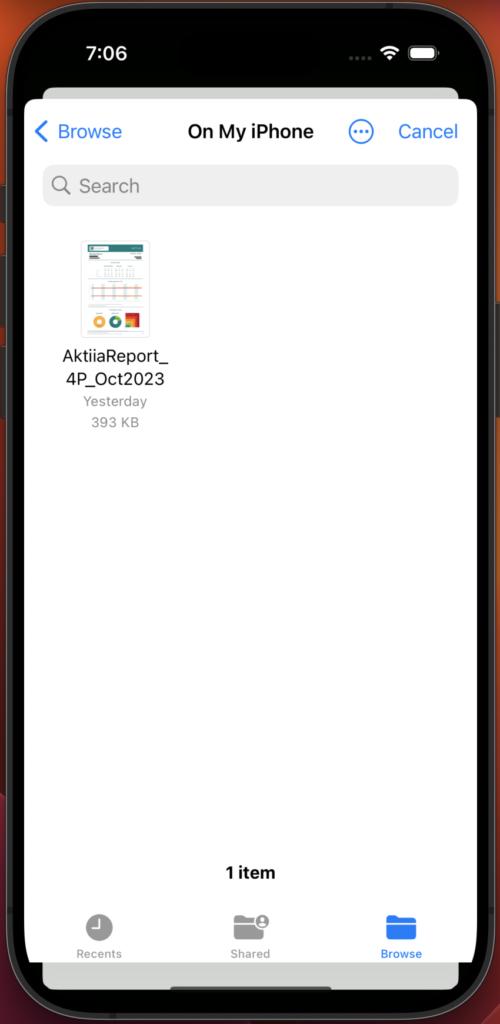
To scan a Hilo report that has already been downloaded onto your phone, select the Scan button in the top right. This is a down arrow with two filled documents behind it.
After you have clicked this button you will be asked to select a file to scan, as shown below. Please select the pdf file you wish to scan.
Whilst the document is being scanned you will be shown a progress bar. You can keep this in the foreground or if you prefer you can Run in Background. This latter option allows you to continue looking at your reports whilst the document is being scanned.
Note: The scanning process will scan the full document for the first time it sees a report. When you scan the same document again, e.g. after more readings become available, then only the pages after the one that has already been scanned will be read. This ensure that the documents can be incrementally be read during the month and the App will de-duplicate the ones that have already been seen.

Once the document is scanned you can view the extracted data by selecting the report:

Sharing the Data Produced by BpExtract
Importing to Apple HealthKit
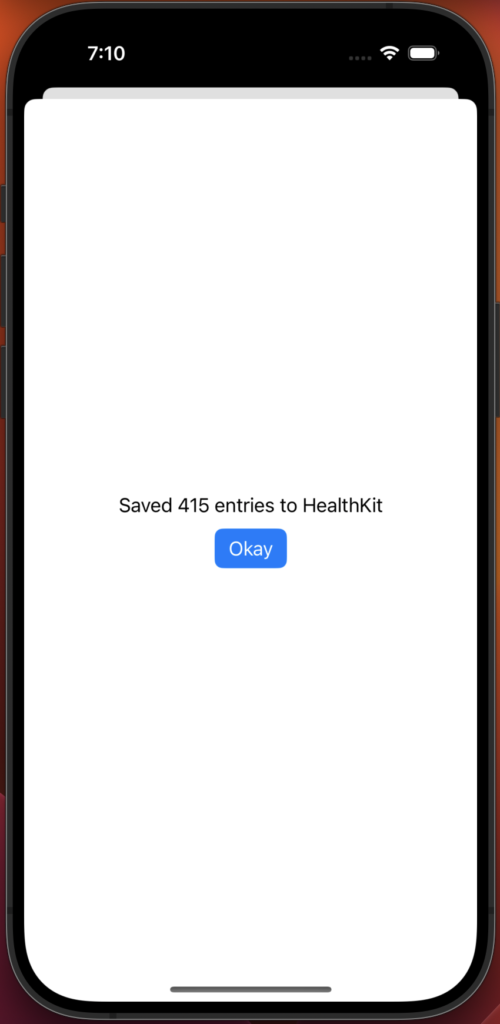
At this point you can share the data (via email, iMessage, etc or download) or import to Apple HealthKit (if enabled).
The import to Apple HealthKit can be enabled automatically by going into the settings (see previous section). Alternatively, you can opt to import them into HealthKit manually by clicking on the to HealthKit button. Note: blood pressure readings are de-duplicated and therefore it is safe to perform this action multiple times over a given month.
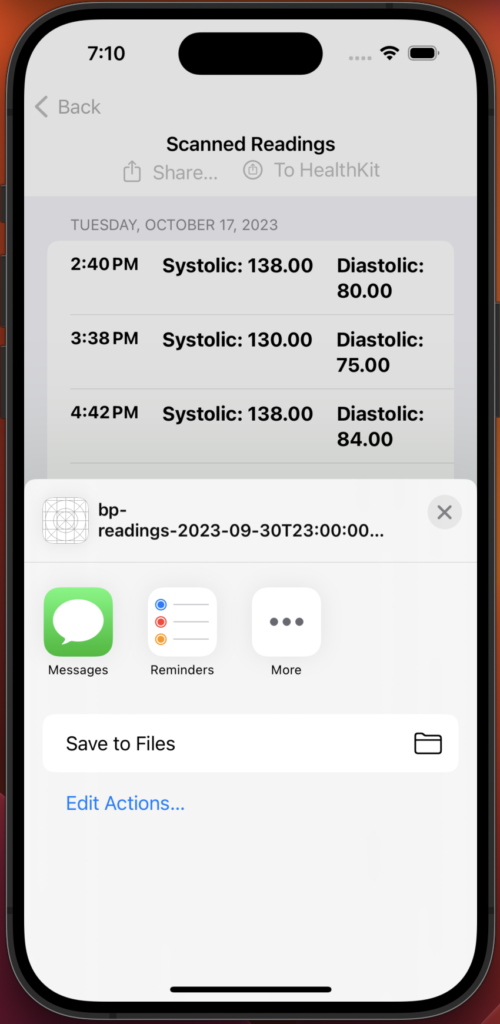
Saving as a CSV file
You can also select share data and download the csv extract to the Files App, as shown in the following screenshot:
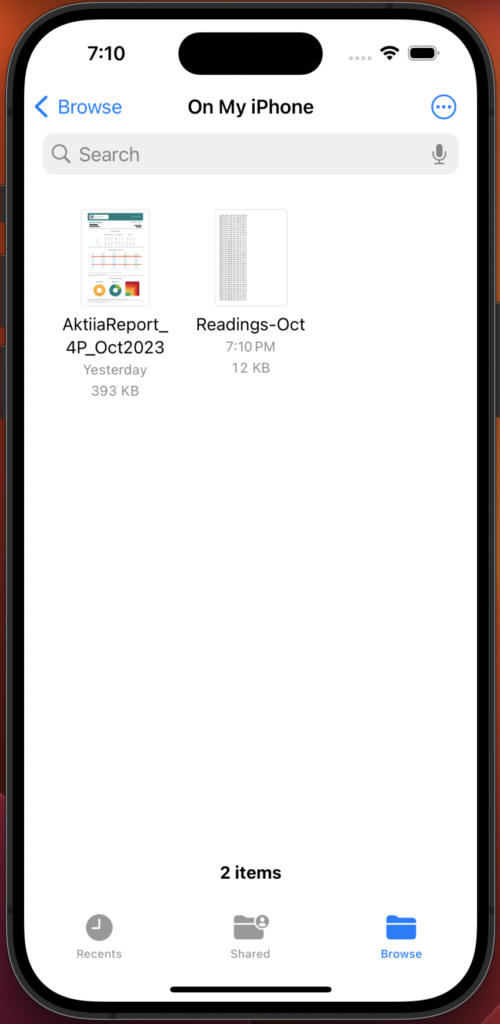
This shows the csv extract saved in Files:
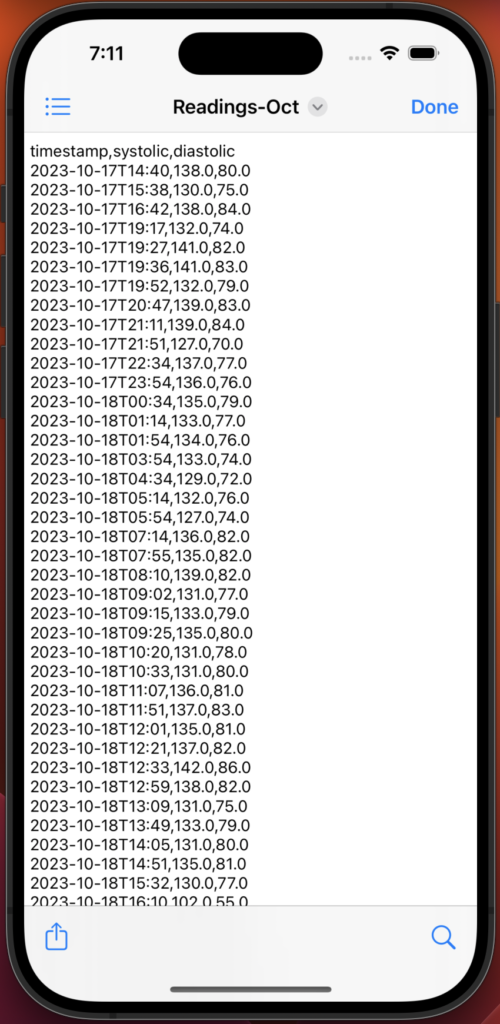
This is what the CSV file looks like:
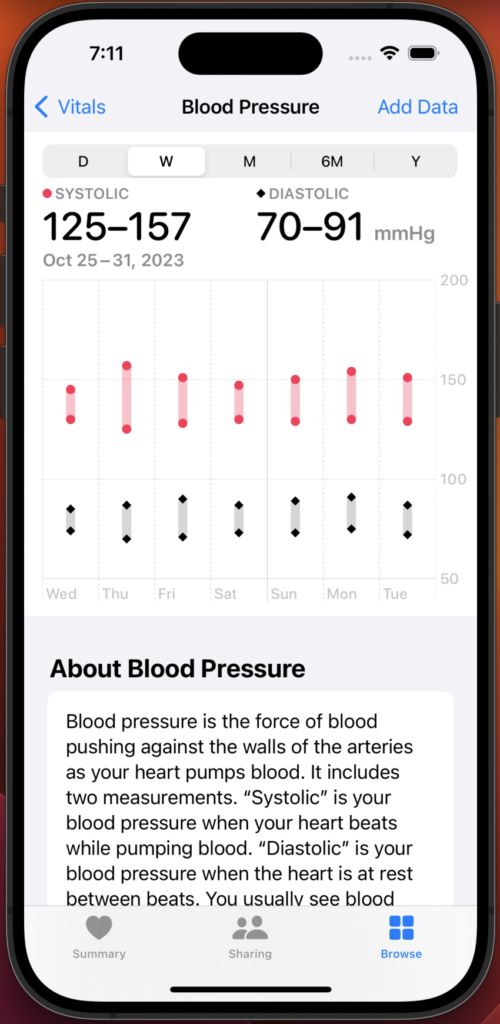
Viewing the BpExtract Data in Apple HealthKit
You can view the Apple HealthKit data using the Apple Health App:

Select Vitals and view the blood pressure data: